
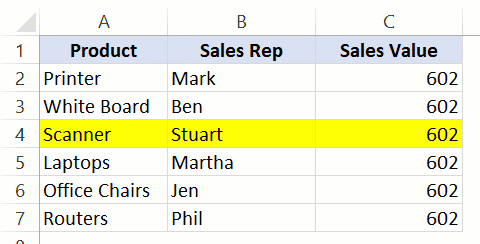
To move rows in Excel, select the desired row, right-click, and choose “Cut.” Then, right-click the destination and select “Insert Cut Cells.”
Excel offers powerful tools for managing data efficiently. One common task is moving rows to reorganize information. This process is simple and can be done in a few steps. Learning how to move rows effectively can save time and improve data management.
Whether you’re working with small datasets or large spreadsheets, mastering this skill is beneficial. Excel’s intuitive interface makes it easy for users of all levels. By knowing how to move rows, you can better organize your data. This ability is crucial for maintaining clarity and accuracy in your spreadsheets.
Credit: trumpexcel.com
Introduction To Moving Rows
Managing rows in Excel can boost productivity. Learning to move rows efficiently is key. This section covers the basics and importance of moving rows in Excel.
Importance Of Row Management
Effective row management helps keep data organized. It makes data analysis easier. Proper management can reduce errors. It also saves time in the long run. Keeping rows in the right order is crucial for clarity.
Scenarios For Moving Rows
There are many reasons to move rows in Excel. Here are some common scenarios:
- Reorganizing data for better readability
- Sorting rows based on specific criteria
- Grouping related data together
- Removing gaps in datasets
Understanding these scenarios helps in applying row moving techniques effectively. This ensures a smooth workflow and better data management.
Preparing Your Worksheet
Before you start moving rows in Excel, ensure your worksheet is ready. Proper preparation helps avoid mistakes and ensures a smooth process. Follow these steps to prepare your worksheet.
Saving Your Work
Always save your work before making changes. It helps to avoid data loss. Follow these steps to save your worksheet:
- Click on the File menu in the top left corner.
- Select Save As.
- Choose a location to save your file.
- Enter a file name and click Save.
Saving your work ensures you have a backup if needed.
Selecting Rows
Selecting the correct rows is crucial for moving data accurately. Follow these steps to select rows:
- Click on the row number on the left side.
- To select multiple rows, click and drag your mouse over the rows.
- Or, hold the Shift key and click the row numbers.
Ensure you select the correct rows to avoid mistakes.
Here is a table summarizing the steps:
| Action | Steps |
|---|---|
| Saving Your Work |
|
| Selecting Rows |
|
By following these steps, you can ensure your worksheet is ready for row movement.
Using Cut And Paste
Excel is a powerful tool for data management. One useful feature is moving rows using cut and paste. This method is simple and effective. It helps in organizing data efficiently.
Cutting Rows
To cut rows in Excel, start by selecting the row you want to move. Click on the row number on the left side. This will highlight the entire row.
Once the row is selected, right-click to open the context menu. Choose the Cut option from the menu. Alternatively, you can use the keyboard shortcut Ctrl + X.
The row will now appear with a dashed border, indicating it is ready to be moved.
Pasting Rows
Next, decide where you want to paste the row. Click on the row number below where you want the new row to appear. Right-click to open the context menu. Select the Insert Cut Cells option.
This will move your cut row to the new location. You can also use the keyboard shortcut Ctrl + V to paste.
Ensure the data is in the correct location before saving your work.
| Action | Steps | Shortcut |
|---|---|---|
| Cut Rows | Select row, right-click, choose Cut | Ctrl + X |
| Paste Rows | Select new row location, right-click, choose Insert Cut Cells | Ctrl + V |
Using the cut and paste method helps in maintaining data integrity. It also saves time and effort while working with large datasets.
Dragging And Dropping Rows
Moving rows in Excel can boost your productivity. One simple way is by dragging and dropping rows. This method is quick and easy to learn. Follow these steps to master it.
Enabling Drag And Drop
First, ensure the drag-and-drop feature is enabled. Follow these steps:
- Open Excel and go to the File tab.
- Select Options from the menu.
- In the Excel Options window, click on Advanced.
- Under the Editing Options section, check the box labeled Enable fill handle and cell drag-and-drop.
- Click OK to save your changes.
Now, you are ready to drag and drop rows.
Dragging Rows
Dragging rows is straightforward. Follow these steps:
- Click the row number on the left to select the entire row.
- Move your cursor to the border of the selected row. The cursor should change to a four-sided arrow.
- Click and hold the left mouse button.
- Drag the row to the desired location.
- Release the mouse button to drop the row in its new position.
This method helps to quickly rearrange your data. Use it to keep your sheets organized.
Using The Insert Function
Moving rows in Excel can seem tricky. Using the Insert Function makes it simple. This method is efficient and easy to learn. Read on to discover how to copy and insert rows in Excel.
Copying Rows
First, select the row you want to move. Click the row number on the left. Then, right-click and choose Copy from the menu. Your row is now copied.
Next, decide where you want to place the copied row. Click the row number where you want the new row to go. Right-click and select Insert Copied Cells.
Inserting Rows
Now, let’s insert a blank row. Click the row number where you want the new row. Right-click and choose Insert. A new blank row will appear above the selected row.
You can also insert multiple rows at once. Select the same number of rows as you want to insert. For example, select two rows if you need two new rows. Right-click and choose Insert. The same number of blank rows will be inserted.
To insert a copied row, first, copy the row as described earlier. Next, click the row number where you want the copied row to go. Right-click and select Insert Copied Cells. The copied row will appear at the selected location.
Using the Insert Function streamlines your Excel tasks. It saves time and reduces errors. Try it out and see the difference it makes.

Credit: m.youtube.com
Moving Multiple Rows
Moving multiple rows in Excel can save time and effort. This guide will help you master this essential skill. Follow these simple steps to select and move multiple rows efficiently.
Selecting Multiple Rows
First, you need to select the rows you want to move. Here’s how:
- Click on the row number of the first row.
- Hold down the Shift key.
- Click on the row number of the last row.
All the rows in between will be selected.
After selecting the rows, you can move them easily:
- Right-click on any selected row number.
- Choose Cut from the context menu.
- Click on the row number where you want to move the rows.
- Right-click and select Insert Cut Cells.
The rows will be moved to the new location.
Here is a summary in a table:
| Step | Action |
|---|---|
| 1 | Select the first row. |
| 2 | Hold Shift and select the last row. |
| 3 | Right-click and choose Cut. |
| 4 | Click on the new row location. |
| 5 | Right-click and select Insert Cut Cells. |
Undoing Mistakes
Moving rows in Excel can sometimes lead to mistakes. Undoing these mistakes is crucial. This guide will help you fix errors easily.
Using Undo Feature
The Undo feature in Excel is a lifesaver. It lets you quickly reverse recent actions.
- Press Ctrl + Z to undo the last action.
- You can undo multiple steps, one by one.
- Look at the top-left corner for the Undo button.
This is helpful if you moved a row by mistake. You can use Ctrl + Z to go back.
Restoring Previous Versions
Sometimes, undoing steps is not enough. You might need to restore an older version of your file.
| Step | Description |
|---|---|
| 1 | Click File in the top menu. |
| 2 | Select Info from the sidebar. |
| 3 | Look for Version History. |
| 4 | Choose a previous version to restore. |
This feature is handy for major mistakes. You can go back to a safe point.

Credit: m.youtube.com
Tips And Tricks
Excel is a powerful tool for data management. Knowing how to move rows efficiently can save time. Here are some tips and tricks to help you master this skill.
Keyboard Shortcuts
Using keyboard shortcuts makes moving rows in Excel faster. Here are some essential shortcuts:
- Ctrl + X: Cut the selected row.
- Ctrl + V: Paste the cut row to a new location.
- Shift + Space: Select the entire row.
- Ctrl + Shift + “+ “: Insert a new row.
Best Practices
Following best practices ensures efficiency and accuracy. Here are some tips:
- Always double-check the data before moving rows. This prevents errors.
- Use filters to find the rows you need to move.
- Keep your data organized. This makes it easier to manage.
- Regularly save your work. This avoids losing data.
Below is a table summarizing these tips:
| Action | Shortcut | Tip |
|---|---|---|
| Cut Row | Ctrl + X | Use this to move rows quickly. |
| Paste Row | Ctrl + V | Always paste in the correct spot. |
| Select Row | Shift + Space | Ensure you select the entire row. |
| Insert Row | Ctrl + Shift + “+” | This adds a new row where needed. |
By using these tips and tricks, you can manage rows in Excel with ease.
Frequently Asked Questions
How Do I Move A Row In Excel?
To move a row in Excel, select the row number. Drag it to the desired location. Release to drop it there.
Can I Move Multiple Rows At Once In Excel?
Yes, you can move multiple rows. Select the rows by clicking and dragging. Then, drag them to the new location.
What Is The Shortcut To Move Rows In Excel?
There isn’t a direct shortcut. Use Cut (Ctrl+X) and Paste (Ctrl+V) to move rows quickly.
Does Moving A Row Affect Formulas In Excel?
Yes, moving a row will update formulas automatically. Excel adjusts cell references to match the new row location.
Conclusion
Mastering how to move rows in Excel can significantly boost productivity. With these simple steps, you can organize data efficiently. Practice regularly to enhance your skills. Excel’s flexibility makes data management seamless and straightforward. Start applying these techniques today and experience the difference in your workflow.