To remove blanks in Excel, use the formula =SUBSTITUTE(A1, ” “, “”). This formula eliminates all spaces from the cell content.
Removing blanks in Excel is crucial for data accuracy and presentation. Blanks can cause errors in calculations and disrupt data analysis. Excel offers several methods to address this, including formulas, filters, and built-in tools. Using the SUBSTITUTE formula is a straightforward way to remove spaces from text.
It enhances the readability and usability of your data. Another method involves using Excel’s “Find and Replace” feature to delete blank spaces. Keeping your data free of unnecessary blanks improves its quality and ensures more precise results. Efficient data management is essential for any analysis or reporting task in Excel.
Introduction To Blank Cells
Handling blank cells in Excel can be challenging. They affect data accuracy and analysis. Understanding the impact of blank cells is crucial for effective data management.
Common Issues
Blank cells in Excel can cause several problems. Here are some common issues:
- Data Inconsistency: Missing values lead to inconsistent datasets.
- Formula Errors: Formulas may return errors or unexpected results.
- Sorting Issues: Sorting data with blanks can misorder information.
- Chart Errors: Blank cells can cause incorrect chart representations.
Impact On Data Analysis
Blank cells significantly impact data analysis. Here are some key points:
| Issue | Impact |
|---|---|
| Statistical Analysis | Blank cells can skew statistical results. |
| Data Visualization | Visualizations may not accurately reflect data trends. |
| Data Interpretation | Blanks lead to incorrect data interpretations. |
| Reporting | Reports may contain gaps, reducing reliability. |
Addressing blank cells is essential for reliable data analysis. Using Excel formulas can effectively remove blanks, ensuring clean data.
Why Remove Blank Cells
Blank cells in Excel can cause many problems. They can make your data messy and hard to read. Removing blank cells helps clean up your data. It ensures you have accurate and meaningful information.
Improving Data Quality
Blank cells can lead to errors in your data. These errors can affect your calculations and analysis. Removing blanks helps maintain high data quality. With cleaner data, your results are more reliable.
- Accurate calculations
- Consistent data sets
- Better analysis
Enhancing Efficiency
Blank cells slow down your work. They make sorting and filtering harder. Removing blank cells speeds up your tasks. It makes your workflow smoother and more efficient.
- Faster sorting
- Easier filtering
- Quicker data entry
Using the Remove Blanks Excel Formula helps achieve these benefits. It keeps your data clean and your work efficient.
Manual Methods
Removing blanks in Excel can be tedious without the right techniques. Manual methods are straightforward and effective for small datasets. Below are some simple yet powerful techniques.
Using Filter Feature
The Filter feature helps identify and remove blanks easily.
- Select the range of data you want to filter.
- Go to the Data tab and click on Filter.
- Click on the filter arrow in the column header.
- Uncheck Select All and check Blanks.
- Press OK to apply the filter.
- Select and delete the filtered blank rows.
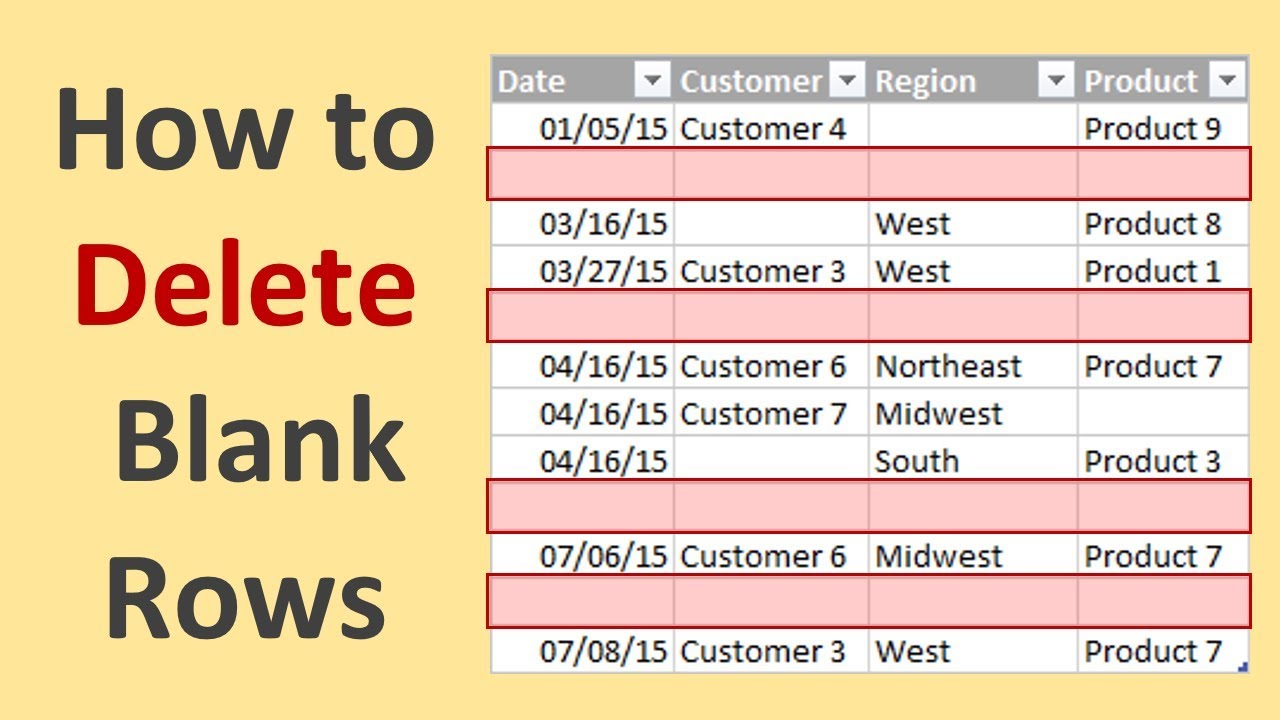
Deleting Rows And Columns
Sometimes, deleting rows and columns is the best method.
Follow these steps to delete blank rows:
- Select the entire row by clicking the row number.
- Right-click and choose Delete.
- Repeat for each blank row.
For deleting blank columns, use these steps:
- Select the entire column by clicking the column letter.
- Right-click and choose Delete.
- Repeat for each blank column.
Using these manual methods will keep your Excel sheets clean and organized.
Credit: www.ablebits.com
Excel Formulas For Removing Blanks
Excel spreadsheets often contain blank cells that disrupt data analysis. Removing these blanks can streamline your workflow. Discover efficient Excel formulas for removing blanks to enhance productivity.
Using If Function
The IF function is a powerful tool in Excel. It helps manage blank cells. Here’s a basic example:
=IF(A1="", "No Data", A1)This formula checks if cell A1 is blank. If it is, it returns “No Data”. If not, it returns the content of A1. This simple formula can be adjusted for various scenarios.
Combining With Isblank
Combining IF with ISBLANK offers more control. The ISBLANK function checks if a cell is empty. Here’s a combined formula:
=IF(ISBLANK(A1), "Blank", A1)This formula checks if A1 is blank. If true, it returns “Blank”. Otherwise, it returns A1’s content. This combination ensures more accurate data handling.
Using these formulas, you can manage blank cells efficiently. Here are some variations:
| Scenario | Formula |
|---|---|
| Return a specific value if blank | =IF(ISBLANK(A1), "Enter Value", A1) |
| Replace blank with zero | =IF(ISBLANK(A1), 0, A1) |
| Check multiple cells | =IF(AND(ISBLANK(A1), ISBLANK(B1)), "Both Blank", "Not Blank") |
These formulas help maintain cleaner data sets. Apply them to enhance your Excel proficiency.
Advanced Techniques
For those looking to remove blanks in Excel more efficiently, advanced techniques come to the rescue. These methods are powerful and versatile. They help you handle large datasets with ease. In this section, we will explore two advanced techniques: Array Formulas and Using VBA Scripts.
Array Formulas
Array Formulas allow you to perform multiple calculations on one or more items in an array. They are particularly useful for complex data manipulation.
To remove blanks using an Array Formula, follow these steps:
- Select the range where you want the results.
- Enter the following formula:
=IFERROR(INDEX(A:A, SMALL(IF(A:A<>"", ROW(A:A)-ROW(A$1)+1), ROW(A1))),"") - Press Ctrl + Shift + Enter to execute the array formula.
This formula checks each cell in the range A:A. It then returns only the non-blank values. The IFERROR function ensures that errors are handled gracefully.
Using Vba Scripts
VBA Scripts provide a powerful way to automate tasks in Excel. They are especially useful for repetitive tasks.
Here’s a simple VBA script to remove blanks:
Sub RemoveBlanks()
    Dim rng As Range
    Dim i As Long

    Set rng = Range("A1:A100") ' Adjust the range as needed

    For i = rng.Rows.Count To 1 Step -1
        If IsEmpty(rng.Cells(i, 1)) Then
            rng.Cells(i, 1).Delete Shift:=xlUp
        End If
    Next i
End Sub
To use this script:
- Press Alt + F11 to open the VBA editor.
- Insert a new module.
- Copy and paste the script into the module.
- Press F5 to run the script.
This script checks each cell in the specified range. It deletes the cell if it is empty. The cells below shift up to fill the blank space.
Automating The Process
Automation saves time and reduces errors. Automating the process of removing blanks in Excel can be done using macros and task scheduling. This guide will teach you how to make your workflow more efficient.
Creating Macros
Macros can automate repetitive tasks. To create a macro in Excel, follow these steps:
- Open Excel and go to the “Developer” tab.
- Click on “Record Macro” and name your macro.
- Perform the steps you want to automate, like removing blanks.
- Stop recording the macro.
Now, your macro will repeat these steps with a single click. This saves time and ensures consistency.
Scheduling Tasks
Scheduling tasks allows you to run your macros automatically. You can use the Windows Task Scheduler for this. Follow these steps:
- Open Task Scheduler on your computer.
- Click on “Create Basic Task” and name your task.
- Set the trigger for your task, like daily or weekly.
- Choose “Start a program” and select Excel.
- Add arguments to run your macro, such as the file path and macro name.
Your task will now run the macro at scheduled times. This ensures your data stays clean without manual effort.
Common Mistakes
Using the Remove Blanks Excel Formula can be tricky. Many users make common mistakes that can lead to errors or lost data. Here, we’ll highlight some frequent errors and how to avoid them.
Overwriting Data
One of the biggest mistakes is overwriting data. This happens when users do not check where the output will go. Always select a new column or sheet for the results. This will keep your original data safe.
For example:
=IF(A1<>"", A1, "")
Make sure to copy this formula into a new column. This ensures your original data remains intact.
Incorrect Formula Usage
Another common issue is using the incorrect formula. Many users get confused with different Excel functions.
Common mistakes include:
- Using TRIM instead of IF or FILTER
- Forgetting to lock cell references with $ signs
- Incorrectly applying array formulas
To avoid these errors, always double-check your formula. Use the correct function for your needs. Here are some examples:
| Function | Purpose |
|---|---|
| TRIM | Removes extra spaces |
| IF | Checks conditions and returns values |
| FILTER | Filters data based on criteria |
Using the right function saves time and prevents errors.
Credit: www.youtube.com
Best Practices
To efficiently use the Remove Blanks Excel Formula, follow these best practices. Adopting these strategies will keep your data clean and organized.
Regular Data Cleaning
Regular data cleaning is crucial for maintaining accurate datasets. Use the following steps to ensure your data remains error-free:
- Schedule routine checks of your data.
- Identify and remove blank cells using the formula.
- Verify data consistency to avoid future errors.
Consistency in data cleaning helps in maintaining data integrity. Make it a habit to clean your data regularly.
Backup Strategies
Implementing a solid backup strategy is essential. Here are some best practices:
- Create backups before performing any data cleaning.
- Store backups in multiple locations.
- Regularly update your backup files.
Backing up your data prevents loss during cleaning. Ensure backups are up-to-date and easily accessible.

Credit: exceljet.net
Frequently Asked Questions
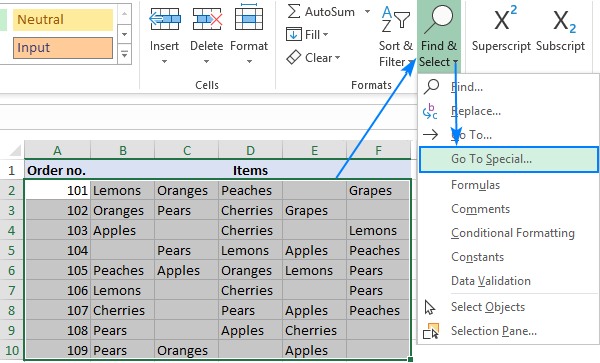
How Do I Remove Blanks In Excel?
Use the “Go To Special” feature, select “Blanks,” and delete or use a formula to filter non-blank cells.
Which Excel Formula Removes Blank Cells?
The FILTER function can remove blank cells by specifying criteria that exclude them.
Can I Use Vba To Remove Blanks?
Yes, VBA can automate the process of removing blank cells efficiently.
Why Do Blanks Appear In Excel?
Blanks can appear due to data entry errors or imported data inconsistencies.
Is There A Shortcut To Remove Blanks?
Yes, you can use the “Ctrl+G” shortcut, then “Special,” and select “Blanks” to remove them.
Do Blanks Affect Excel Formulas?
Yes, blanks can disrupt calculations and data analysis, leading to errors or incomplete results.
Conclusion
Mastering the Remove Blanks Excel formula can greatly enhance your productivity. It simplifies data management and ensures cleaner spreadsheets. Implementing this technique can save time and reduce errors. By using these steps, you can maintain organized and efficient Excel files.
Keep practicing to become proficient and streamline your workflow.